Leave Your Message

How to Choose the Best Rear View Camera?

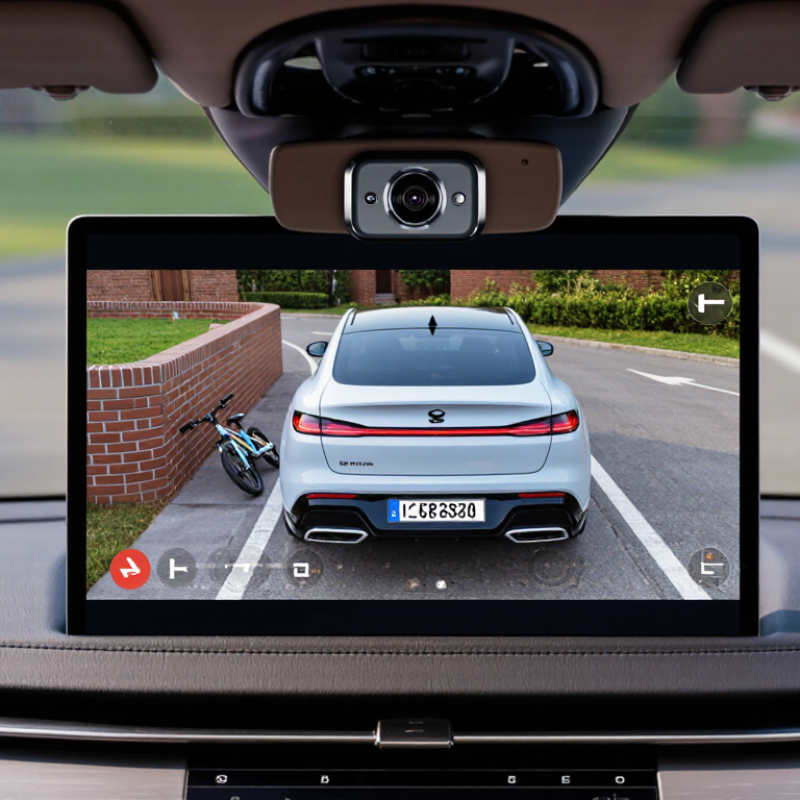
Choosing a Rear View Camera is not simply a matter of picking the sharpest screen. It is about seeing a low wall, a child’s bicycle, or a narrow parking-space line before moving backward. The stakes are real. In its 2014 rear-visibility rulemaking, the U.S. National Highway Traffic Safety Administration estimated that rearview cameras could prevent 58 to 69 deaths each year. That estimate is a useful safety benchmark, not a promise that any single camera will prevent a crash.

The same NHTSA announcement quoted U.S. Transportation Secretary Anthony Foxx: “This is an important safety rule that will help reduce the risk of backover crashes, especially those involving children and the elderly.” His point helps frame a practical buying decision: assess the camera’s view, display, and reliability together. A crisp image can still be misleading if the lens is poorly placed or the screen is hard to see in bright sunlight.

This guide will compare wired and wireless systems, image quality, viewing angles, night performance, and installation demands. It will also explain which features matter in daily use, rather than merely looking impressive on a product page. Check the display from your normal driving position. Notice what disappears near the bumper. Small details count. No camera removes blind spots, and that is easy to forget when a picture looks clear. Use the system as an aid, not a substitute for checking your surroundings.
How to Choose the Best Rear View Camera?

Understand Rear View Camera Types and How They Work

Rear-view cameras vary by connection, display, and field of view. A wired camera sends video to the dashboard screen through a cable, often giving a steady signal. Wireless models avoid a long cable, but nearby electronics can sometimes cause interference. The screen may sit in the dashboard or replace part of the rear-view mirror. Small differences matter. A wide-angle lens shows more of the area behind the car, though objects can look farther away than they are. Most systems switch on when reverse is selected and show guide lines to help judge direction.

Some vehicles combine rear and side cameras to create a bird’s-eye view. These systems stitch several images together, so the picture may look slightly distorted near the edges. An IIHS analysis published in 2014 found rear-view cameras were associated with 17% fewer police-reported backing crashes. Cameras combined with parking sensors were associated with 42% fewer. These tools help, but they do not show every obstacle or replace a careful look around the vehicle.

Tips: Check the screen in daylight and at night before choosing. Look for a clear image, useful guide lines, and a view that includes low objects near the bumper. Keep the lens clean. A little road grime can blur the picture.
How to Choose the Best Rear View Camera?

Typical camera count in common rear-view camera configurations

A conventional backup camera and a camera-based digital rear-view mirror typically use one rear-facing camera. A 360-degree surround-view system commonly combines four cameras—front, rear, and two side cameras—to create a stitched view around the vehicle. Camera counts vary by vehicle and system; consider viewing angle, low-light performance, display quality, and installation needs when choosing.

Check Vehicle Compatibility and Installation Requirements

Before choosing a rear view camera, check how it will connect to your vehicle. Do not rely on model year alone. Compare the camera’s voltage and video signal with the display’s supported input. Some factory screens need an adapter; others may not accept an added camera. Check the mounting space, too. A camera designed for a license plate may not fit a tailgate handle or bumper recess. Measure twice.

Installation can involve more than attaching the camera. A wired system may need a cable routed through the hatch and a rubber wiring boot. A wireless model still needs power and a suitable connection to the display. Check whether your vehicle has a reverse-light trigger wire and whether the kit supports it. It is tempting to assume the wiring will be simple, but trim panels and tight passages can make the job slow.

Read the vehicle and camera instructions before removing panels. If the wiring diagram is unclear, ask a qualified installer rather than guessing at connections. Test the image, parking guidelines, and night view before replacing trim. A slight image delay or a blocked camera angle can be easy to miss in a quick test. Small details matter.

Compare Image Quality, Viewing Angles, and Display Options

A useful rear-view camera should show a clear, stable picture in the conditions you actually drive. Compare image quality in daylight and at dusk, not just on a bright shop screen. Look for details near the bumper, such as a curb edge or a bicycle wheel. A high pixel count can help, but glare, low-light performance, and a dirty lens matter too. That matters. If possible, check the image while the vehicle is parked. Do colors and distances look natural? Avoid judging distance from the screen alone; camera perspective can make objects seem farther away. It is easy to focus on sharpness and overlook this.

A wide viewing angle can reveal traffic approaching from the sides, especially when backing out between parked cars. But an extremely wide lens may bend edges and make distant objects look smaller. Check the stated horizontal and vertical coverage, then consider your camera’s mounting position. Vehicle shape and mount height change the view. Display options deserve equal attention: a screen should be bright enough in sunlight, easy to glance at, and placed without blocking your view of the road. A built-in display may feel convenient, while a separate screen can be easier to position. I would not choose by screen size alone; a large image with noticeable delay can be harder to use than a smaller, responsive one. Test the controls, too. The menu may be less intuitive than expected.

How to Choose the Best Rear View Camera? — Compare Image Quality, Viewing Angles, and Display Options

System Type Typical Image Quality Typical Viewing Angle Low-Light Performance Display Options Best Suited For Key Consideration
Standard-definition wired camera Composite video, commonly described by manufacturers in TV lines; generally less detailed than HD systems. About 120°–150° diagonal Varies by sensor and lens. A larger aperture and a capable image sensor can help in dim conditions. Compatible mirror monitor, dedicated screen, or head unit with a composite video input; often around 4.3–7 inches. Basic reversing assistance and straightforward retrofits. Check that the camera’s video output matches the display input. A wider angle shows more area but makes distant objects look smaller.
HD wired camera Often 720p or 1080p digital video, providing more visible detail than standard-definition video when the display supports the same resolution. About 120°–170° diagonal Can retain more detail than a basic system in low light, but results depend on sensor sensitivity, exposure, and image processing. HD-compatible monitor or head unit; commonly a dedicated screen or an in-dash display around 7–10 inches. Drivers who want clearer detail and a stable video connection. Confirm that the camera, cable or interface, and display all support the same video format and resolution.
Digital wireless camera May offer standard-definition or HD video; image detail depends on the camera and receiver rather than the wireless connection alone. About 120°–170° diagonal Depends on the camera sensor and available light. Wireless transmission does not itself improve night vision. Usually paired with a dedicated receiver monitor; some systems can connect to a compatible vehicle display. Vehicles where routing a video cable is difficult. Wireless performance can be affected by distance, interference, and vehicle structure. Check for signal delay and dropouts in the intended installation.
Mirror-integrated camera system Ranges from standard definition to HD, depending on the camera and mirror display. About 120°–170° diagonal Varies by camera; some systems use image processing or infrared illumination. Infrared night images are typically monochrome. Screen built into a replacement or clip-on rear-view mirror, commonly around 4.3–10 inches. Drivers who want a dedicated view without adding a separate dashboard screen. Check mirror fit, screen visibility in daylight, and whether the system preserves a usable reflective mirror view when the display is off.
Wide-angle camera with parking guidelines Available in both standard-definition and HD versions; guidelines may be fixed or adjustable depending on the system. About 150°–180° diagonal Depends on the sensor and lens; a wide field of view does not guarantee better low-light image quality. Requires a compatible monitor or head unit that can show the camera image and guidelines. Parking in tight spaces or monitoring a broad area behind the vehicle. Very wide lenses can add distortion and make objects appear farther away. Guidelines should be checked against the vehicle’s actual path.

Selection tip: Compare the complete system, not just the camera. Verify video-format compatibility, usable screen size, viewing angle, night-time image quality, and whether the display clearly shows the area you need. Specifications and performance vary by model and installation.

Assess Weather Resistance, Safety Features, and Reliability

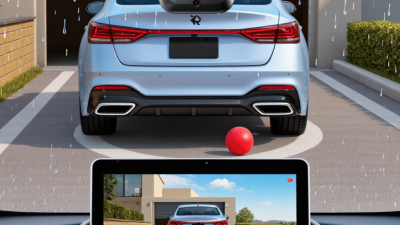
A rear-view camera sits close to road spray, dust, and temperature swings, so weather resistance deserves a close look. Check the camera’s stated ingress rating and temperature range, then inspect how its cable and connector are sealed. An impressive rating is not a guarantee of lasting protection; installation and wear matter too. Small details matter. A loose connector can let moisture in, even when the camera housing seems sturdy.

Safety depends on the view, not just the feature list. Look for a wide, useful image, clear performance in low light, and a display with little delay. Parking guidelines can help judge distance, but they may not match the vehicle’s actual dimensions. Adjust the camera while parked, and ask someone to stand behind the vehicle at a safe distance. Nothing is foolproof. The camera can miss low objects or areas outside its view, so keep using mirrors and checking surroundings.

Reliability shows up over time. Vibration can shift a poorly secured camera, while exposed wiring may wear against sharp edges. Before choosing a system, consider whether its connections are easy to inspect and whether the image stays stable after rough roads and rain. It is easy to overvalue a crisp showroom image. A slightly less polished picture that remains dependable may be more useful day to day.

Balance Price, Warranty, and Long-Term Support

A low-priced rear-view camera can look like a smart deal, but the checkout price is only part of the cost. Compare what comes in the box: the camera, wiring, display, and mounting hardware. A missing extension cable may mean extra expense and another installation step. Check whether the warranty covers parts and labor, and read its exclusions before buying. A long warranty matters less if the claim process is unclear.

Long-term support can save time when a screen flickers or a connector fails months later. Look for clear installation instructions, reachable customer service, and access to replacement cables or compatible parts. Ask how support handles troubleshooting, and whether help is available after the initial setup. Keep a copy of the warranty and receipt. Small details matter.

I may be overvaluing support when comparing options; it is hard to predict which camera will need help. Still, a short written answer about replacement parts can reveal more than a low price tag. Consider the total cost over several years, not just the amount paid today. A modestly priced model with useful support may be easier to live with, especially if your vehicle needs a longer cable run. Repair options vary, so verify compatibility before ordering.