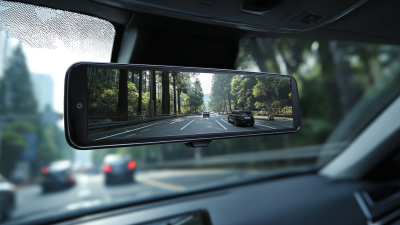
2026 How to Install a Rear View Camera Kit Easily?
Installing a Rear View Camera Kit can significantly enhance your driving experience. It improves safety and convenience when reversing, especially in crowded areas. However, the installation process may seem daunting to many. With the right guidance, it is not only achievable but can also be quite rewarding.
Many enthusiasts have successfully installed these kits on their own. They report a sense of accomplishment that comes from completing the task. Yet, some challenges can arise. For instance, understanding the wiring and proper positioning of the camera can be tricky. Adapting to your vehicle's specific layout is crucial.
This guide will offer step-by-step instructions to simplify the process. You'll gain insights from experts who've navigated these challenges before. With a bit of patience and attention to detail, you too can master the installation of a Rear View Camera Kit. Embracing the process can lead to greater satisfaction and make every drive safer.

Understanding the Components of a Rear View Camera Kit
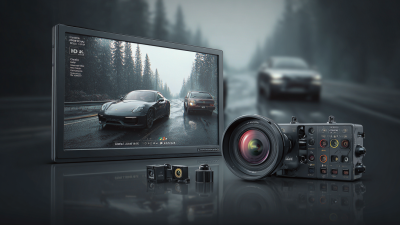
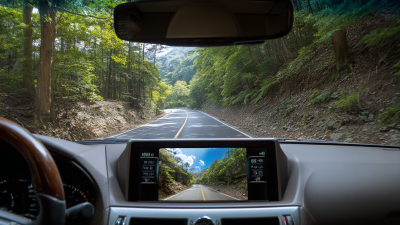
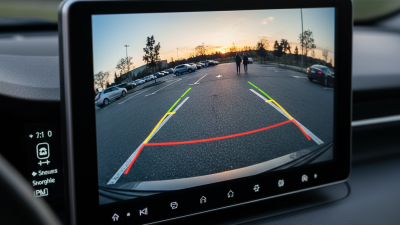
Understanding the components of a rear view camera kit is crucial for a successful installation. A typical kit includes a camera, a monitor, wiring harnesses, and mounting hardware. The camera captures images behind the vehicle, transmitting them to the monitor inside the car.
According to industry reports, nearly 75% of all new vehicles feature rear view cameras due to safety regulations. This data reflects the growing emphasis on reducing blind spots and enhancing driver awareness.
Choosing the right camera is essential. Many options are available, including wide-angle lenses, which offer a broader field of vision. A quality camera can provide clear images even in low light. Statistics show that 90% of backups can be prevented with proper visibility. However, some drivers still struggle with installation, often due to wiring complexities. It’s common for users to overlook existing vehicle features, like built-in displays or audio systems, which might complicate the installation process further.
Wiring is another critical component. Use quality wiring to ensure durability and prevent signal loss. Poor wiring choices can lead to intermittent camera performance. Many installations may appear easy, but they require careful attention to detail. Errors during installation might require troubleshooting, leading to delays. Understanding these components and their functions helps ensure a successful installation process for better road safety.
Preparing Your Vehicle for Installation
Preparing your vehicle for the installation of a rear view camera kit is essential for a seamless experience. Begin by gathering necessary tools such as a screwdriver, wire stripper, and electrical tape. This preparation stage can take some time, but it's crucial for a successful installation.
According to a report from the National Highway Traffic Safety Administration, adding rear view cameras can reduce accidents by 17%. Ensuring that your vehicle is clean and organized can facilitate a better working environment.
Next, identify the best location for the camera on your rear license plate area. A precise fit is vital for optimal functionality and visibility. Ensure the area is free from obstructions. Reviewing the assembly instructions thoroughly can save you from installing the camera incorrectly, which can lead to frustration and additional costs.
A survey showed that 40% of DIY automotive projects fail due to improper planning and preparation. Familiarize yourself with your vehicle's wiring system as well. Mismatched connections can lead to unreliable camera performance.
Before starting the installation, it is wise to disconnect the car battery. This ensures safety and prevents electrical shorts. While some might rush this step, it's a significant point to consider. Spending time on preparation makes the overall process smoother. Keep in mind that the quality of your installation can greatly impact camera performance.
Review your work after installation for any signage of loose wires or misalignments. A thorough check can help avoid future complications.
Step-by-Step Installation Process of Rear View Camera Kit
Installing a rear view camera kit can enhance your driving experience considerably. The process may seem daunting, but breaking it down into manageable steps makes it easier. Ensure you have all the necessary tools before starting. This includes a camera kit, power sources, and basic hand tools like a screwdriver and wire strippers.
Begin by locating the best position for the camera. Ideally, mount it above the license plate area for a clear view. Clean the surface to ensure a secure attachment. Once mounted, run the wiring from the camera through the trunk into the passenger compartment. This part can be tricky; take your time to avoid pinching wires that may cause malfunctions. Connecting the camera to the power source is also crucial. You might need to trace wires carefully. A mistake here could lead to a non-functioning camera.
Don't forget to test the camera before finalizing everything. It’s essential to check the angle and clarity. Issues might arise, such as fuzzy images or poor angles. Adjustments may be necessary. Patience is key, as not every installation goes smoothly on the first try. Taking notes during this process can help if you need to recheck any steps later.
Testing and Adjusting Your Rear View Camera
Installing a rear view camera is a smart choice for enhancing vehicle safety. However, proper testing and adjustment are key to ensuring optimal performance. Research indicates that around 25% of all vehicle accidents occur during reverse maneuvers. Thus, having a well-calibrated camera can significantly reduce these incidents.
When testing your rear view camera, start by checking the image clarity. Ensure the lens is clean and unobstructed. A survey by the National Safety Council revealed that 73% of drivers reported improved confidence when reversing with a clear camera view. Next, adjust the camera angle. It should encompass the entire field behind the vehicle. Achieving the right view can take several attempts. This process can feel tedious but is crucial.
In addition to image quality, consider the camera’s response time. A lag in video feed can lead to misjudgment. Testing various distances and angles helps determine the best settings for your unique driving environment. Take the time to reflect on any misalignments or glare. Remember, regular checks are essential to maintain functionality. A properly adjusted rear view camera can contribute to a safer driving experience, reducing risks and enhancing your overall driving efficiency.
2026 How to Install a Rear View Camera Kit Easily? - Testing and Adjusting Your Rear View Camera
| Step |
Description |
Tools Required |
Time Required |
| 1 |
Gather all necessary tools and materials. |
Screwdriver, Wire Stripper, Camera Kit |
15 minutes |
| 2 |
Remove the vehicle’s license plate holder. |
Screwdriver |
10 minutes |
| 3 |
Install the rear view camera at the license plate area. |
Camera Kit, Screws |
20 minutes |
| 4 |
Run the video cable from the camera to the front of the vehicle. |
Cable Ties |
30 minutes |
| 5 |
Connect video cable to monitor or head unit. |
Wire Stripper, Electrical Tape |
15 minutes |
| 6 |
Test the camera functionality. |
Monitor |
5 minutes |
| 7 |
Adjust camera angle for optimal viewing. |
None |
10 minutes |
Maintaining Your Rear View Camera System for Longevity
Maintaining your rear view camera system is crucial for its longevity. Regular checks can prevent unexpected failures. Make it a habit to inspect the camera and wiring frequently. Look for signs of wear, corrosion, or loose connections. These small issues can lead to bigger problems if ignored. Cleaning the camera lens is essential. Dust and grime can obstruct your view, compromising safety.
**Tips:** Always use a soft cloth for cleaning. Avoid harsh chemicals that can damage the lens. If the camera's image is unclear, check the connections. Sometimes, a simple re-plugging can solve the issue.
Temperature changes can affect camera performance. If you live in an area with extreme weather, consider additional protection. Using a weatherproof cover can extend the life of your system. Yet, always ensure that it doesn't obstruct the view.
**Tips:** Watch for condensation inside the camera housing. It can indicate a seal issue. If problems persist, consulting a professional is advisable. Regular maintenance is a proactive approach to ensuring your camera system remains functional for years.
2026 Rear View Camera System Maintenance Analysis