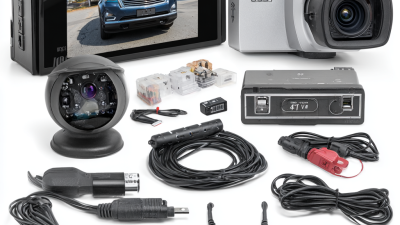
Choosing the 2026 best Rear View Camera Kit is not simply about buying the sharpest screen. A reliable system must suit your vehicle, driving habits, weather conditions, and installation skills. A compact hatchback may need a wide viewing angle, while a pickup truck often needs a longer cable and a camera mounted above the tailgate.
Visibility matters most.
David Strickland, former NHTSA administrator and automotive safety authority, said, “This rule will save lives and prevent injuries.” His statement reflects the camera’s real purpose: reducing blind areas behind the vehicle, especially near children, bicycles, shopping carts, and low concrete posts. A strong Rear View Camera Kit should provide a clear image at night, resist rain, and display useful guidelines without distracting the driver.
This guide compares wired and wireless designs, monitor sizes, night vision, viewing angles, and installation requirements. It also considers image delay, connector quality, screen brightness, and compatibility with factory infotainment systems. Some kits advertise easy installation, yet the process may still require routing cables through tight trim panels. That detail is easy to underestimate.
No kit is perfect.
Signal interference can affect some wireless systems. Oversized screens may block part of the dashboard view. Even excellent cameras cannot replace careful mirror checks and direct observation. We will examine these weaknesses honestly, using practical vehicle examples rather than relying only on manufacturer claims. The final choice should offer dependable visibility, sensible installation, and long-term value—not merely an impressive specification sheet.
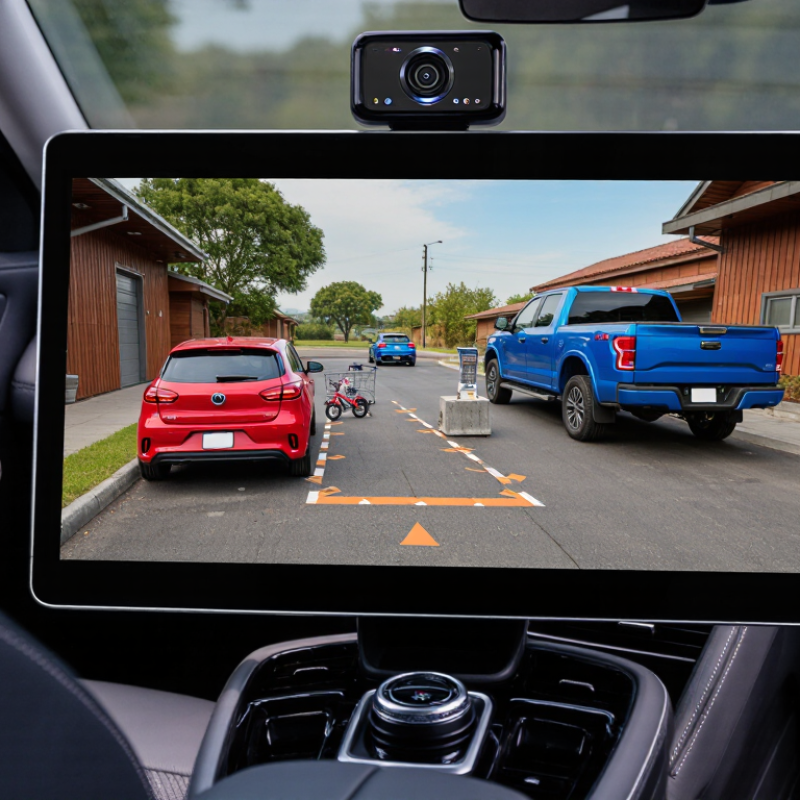
A rear view camera kit is a driving aid that shows the area behind a vehicle on a dashboard screen. It usually includes a small camera, a display, power cables, and video connectors. Some kits use wireless signal transmission, while wired systems often provide a steadier image.
The camera normally connects to the reverse-light circuit. When reverse gear is selected, that circuit sends power to the camera and activates the display. The camera captures a wide-angle view, then sends it to the screen in real time. It is simple. However, the image may show curved distances, especially near the bumper. A visible object can be closer than it appears.
During installation, the camera should sit near the vehicle’s centerline and remain level. A loose mount can create a shaking image over rough roads. The lens also needs protection from mud, rain, and road spray. Night performance varies. Infrared lighting or a low-light sensor can help, but neither removes glare from headlights.
I once tested a camera after a quick installation and noticed the parking lines pointed slightly left. The vehicle was straight, but the camera was not. That small error changed my judgment of nearby space. Calibrating the view with a measured parking area is more reliable than guessing. Drivers should still check mirrors and blind spots, because a camera cannot show every cyclist, child, or narrow obstacle.
A rear view camera should match the vehicle’s shape, mounting area, and display system. Sedans and hatchbacks often suit license-plate cameras. They sit neatly above the plate and provide a centered view. Their small housing keeps the trunk design clean. However, a low mounting position may show more bumper than expected.
SUVs, vans, and pickup trucks usually benefit from surface-mounted cameras. These cameras can sit near the tailgate handle or rear door, giving a higher viewing angle. A flush-mounted model looks cleaner, but installation requires accurate drilling and sealing. For trucks with tall beds, choose a camera with adjustable tilt. Otherwise, the screen may show too much sky. It happens more often than people think.
Wired systems generally provide steadier images in larger vehicles. Wireless systems can simplify installation, especially in older cars, but signal interference remains a practical concern. Check the camera’s viewing angle, night performance, waterproof rating, and operating voltage before buying. A moving tailgate also needs flexible cable protection. For factory displays, confirm input compatibility instead of assuming every camera will work. I have seen installations fail because the connector fit physically, but the video format did not. Clear guidelines can help, though curved lines are not always perfectly accurate. Test the camera at night, in rain, and with the vehicle loaded. That final check is easy to skip.
Choosing the best rear view camera kit starts with your vehicle, not the screen. Measure the license-plate area and check whether your vehicle has a factory display, aftermarket monitor, or no screen at all. A compatible kit should match your vehicle’s power system and reversing-light circuit. Some vehicles need an additional interface for stable video.
Look for a camera with a wide viewing angle, clear night performance, and an IP-rated weather-resistant housing. A useful image should show the bumper edge and several meters behind the vehicle without excessive distortion. Test the camera at dusk, not only in bright daylight. Cable length also matters. A van may require much more wiring than a small hatchback. Leave extra cable near the tailgate hinge.
Installation quality affects reliability more than impressive specifications. Route wires away from airbags, sharp metal, hot engine parts, and moving hinges. Use sealed connectors and secure loose sections with proper clips. I once left too little slack near a hatch, and repeated opening weakened the connection. That mistake was avoidable.
Check whether the display reverses the image correctly and whether parking guidelines can be adjusted. Fixed guidelines may mislead drivers when the camera angle changes. The system should support safe observation, not replace mirrors, direct vision, or careful maneuvering. Verify local rules for camera placement, screen position, and wiring before installation. A professional inspection is sensible when the vehicle has complex electronics.
Installing a rear view camera kit is manageable when you plan the wiring before removing interior panels. Park on level ground, switch off the ignition, and disconnect the negative battery terminal. Choose a centered mounting position above the license plate area, then check the camera’s viewing angle. A slightly downward angle usually shows the bumper and nearby ground.
Route the video cable through existing grommets whenever possible. Keep it away from sharp metal, moving hinges, and airbag components. Connect the camera’s power wire to the reverse-light positive wire, and attach its ground to clean, unpainted metal. Connect the video plug to the display’s camera input. Restore the battery, select reverse, and test the image before securing every panel. My first test once showed a blank screen because the ground point had surface paint. Small details matter.
Tips
Seal any drilled opening with a suitable rubber grommet and weatherproof sealant. Leave gentle cable slack near the trunk hinge. Do not pull wires tightly. Confirm the image is stable in daylight and darkness. If the picture flickers, inspect the ground and connector alignment before replacing parts. Wireless kits still need reliable power connections. Check the vehicle service manual for wire colors, because they can differ between models and production years. A qualified installer is sensible when trim removal risks damaging clips or safety equipment.
| Camera Kit Type | Typical Video Resolution | Viewing Angle | Night Vision | Weather Protection | Power Requirement | Best Vehicle Applications | Installation Difficulty | Typical Installation Time | Main Advantages |
|---|---|---|---|---|---|---|---|---|---|
| Wired License-Plate Camera Kit | 720p to 1080p | 120° to 170° diagonal | Infrared LEDs or low-light image sensor | IP67 or higher on many models | 12 V vehicle electrical system; usually less than 500 mA | Cars, hatchbacks, sedans, and small SUVs | Easy to Moderate | 2 to 4 hours | Stable connection, low wireless interference, and a neat mounting position |
| Wireless Digital Camera Kit | 720p to 1080p | 120° to 150° diagonal | Automatic low-light enhancement; some models include infrared lighting | IP65 to IP69K, depending on the camera housing | 12 V camera and transmitter circuits | Cars, pickup trucks, SUVs, and vehicles where cable routing is difficult | Easy | 1.5 to 3 hours | Faster installation with fewer video cables running through the vehicle |
| Digital Wireless Monitor Kit | 720p to 1080p | 120° to 170° diagonal | Automatic exposure and low-light compensation | Camera commonly rated IP67 or above | Camera: 12 V; monitor: 12 V accessory socket or fused circuit | Vehicles without a factory display or with limited dashboard space | Easy to Moderate | 2 to 4 hours | Includes a dedicated screen and avoids compatibility issues with factory infotainment systems |
| OEM-Style Replacement Camera Kit | 720p to 1080p, depending on the vehicle display | 130° to 170° diagonal | Low-light sensor with automatic brightness adjustment | Typically IP67 or better | Usually 12 V, with vehicle-specific wiring requirements | Vehicles with an existing camera location or factory-style tailgate handle | Moderate to Advanced | 3 to 6 hours | Clean factory-like appearance and integration with an existing screen when compatible |
| Rugged Truck and Trailer Camera Kit | 720p to 1080p | 100° to 150° diagonal | Infrared night vision or high-sensitivity image sensor | IP67 to IP69K with vibration-resistant housing | 12 V or 24 V systems; verify the camera and monitor ratings | Pickup trucks, vans, trailers, motorhomes, and commercial vehicles | Moderate | 3 to 8 hours | Designed for longer cable runs, vibration, dust, rain, and frequent outdoor use |
| Front-and-Rear Dual-Camera Kit | 720p to 1080p per camera | 100° to 150° per camera | Automatic day/night switching | Rear camera commonly IP67 or higher; front camera should also be weather-rated | 12 V system with separate trigger or switching wires | SUVs, vans, trucks, and vehicles requiring forward and reverse visibility | Moderate | 3 to 6 hours | Provides additional forward visibility and can support manual camera selection |
| Mirror-Monitor Camera Kit | 720p to 1080p | 120° to 160° diagonal | Low-light enhancement with automatic brightness control | Camera commonly IP67 or above | 12 V ignition-switched power | Cars and SUVs needing a larger viewing screen without a separate dashboard monitor | Moderate | 2 to 5 hours | Uses the rear-view mirror area and can preserve a clean dashboard layout |
2026 Best Rear View Camera Kit for Any Vehicle?
How to Test, Maintain, and Troubleshoot the System
A reliable rear view camera starts with a careful installation check. Park on level ground, engage the parking brake, and switch on the display. Select reverse, then confirm the image appears without flickering or delay. Walk behind the vehicle with a safe distance maintained. The screen should show the full viewing area, including low obstacles near the bumper. Test it in daylight, shade, rain, and darkness. Bright lights can expose glare that a quick driveway test misses.
Keep the lens clean with a soft, damp cloth. Avoid abrasive cleaners, because tiny scratches scatter light at night. Inspect the camera housing, mounting screws, cable bends, and connector seals every few months. Look for moisture, green corrosion, or loose insulation. A small cable strain can cause an intermittent image. It is easy to blame the camera too soon.
Troubleshooting should follow a simple path. Check the vehicle fuse, power connection, ground point, and reverse signal. Use a multimeter if available, and compare readings with the vehicle manual. Do not guess from screen symptoms alone. A black display may indicate power loss, a damaged cable, or a failed monitor. I have seen a clean lens hide a weak ground connection. That mistake wastes time. If the fault appears only during rain, inspect water entry around seals and cable openings. Replace damaged parts before testing again. Always confirm the system does not replace direct observation. Cameras can miss children, pets, or narrow objects.
How to Test, Maintain, and Troubleshoot the System
How to read this test: A typical 12-volt vehicle reverse-trigger signal should remain near 0 V when reverse is not selected and rise to approximately 12–14.7 V when reverse gear is engaged. A delayed, unstable, or low reading can indicate a weak connection, poor ground, damaged fuse, or trigger-wire fault.
Maintenance tip: Inspect connectors for moisture, clean the camera lens, secure cable routing away from sharp edges, and verify the ground connection during routine service.