Leave Your Message

How to Choose the Best Rear View Monitor in 2026?

Choosing the best Rear View Monitor in 2026 requires more than comparing screen size and camera resolution. A dependable system should improve visibility without distracting the driver. It should also match the vehicle, installation space, lighting conditions, and daily driving habits.

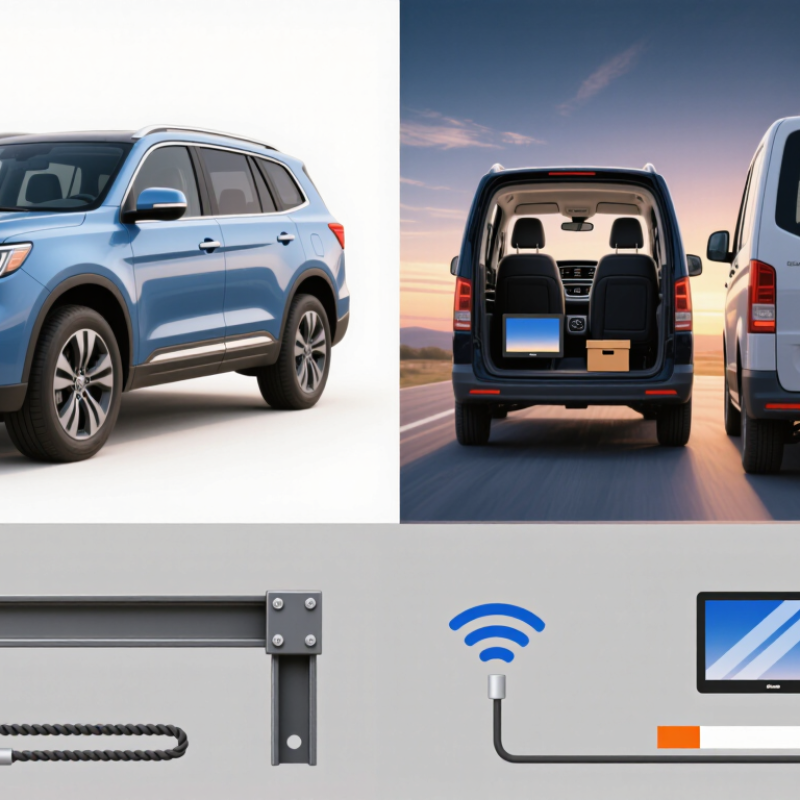
A clear 7-inch display may suit a family SUV, while a compact screen can work better in a small van. Check image clarity at night, glare control, viewing angles, and response speed. A camera that performs well in bright sunlight may show noise in a dim parking area. That difference matters. Look for practical testing details, including rain exposure, reversing at dusk, and viewing objects near the bumper. Backup guidelines still require careful observation, even with advanced technology.

Durability deserves equal attention. Examine the monitor’s mounting strength, cable protection, waterproof rating, and warranty support. Wireless models can simplify installation, but signal interruptions may occur around metal-bodied vehicles. Wired systems often require more effort, yet they may provide steadier performance. This is not always true.

A trusted manufacturer should explain its testing standards and publish realistic specifications. Independent reviews can reveal weaknesses that product pages overlook. Still, no single review answers every question. Your own vehicle layout matters. Measure twice.

This guide will compare display quality, camera performance, installation difficulty, reliability, and value. It will also identify common buying mistakes, including choosing resolution over useful visibility. The ideal Rear View Monitor is not necessarily the most expensive model. It is the one that delivers a stable, understandable view when conditions become difficult.

How to Choose the Best Rear View Monitor in 2026?

What a Rear View Monitor Is and How It Improves Driving Visibility

How to Choose the Best Rear View Monitor in 2026?

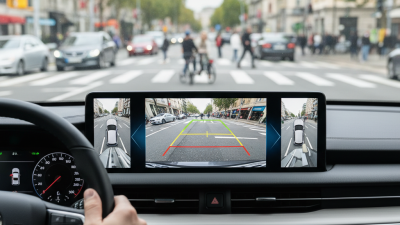
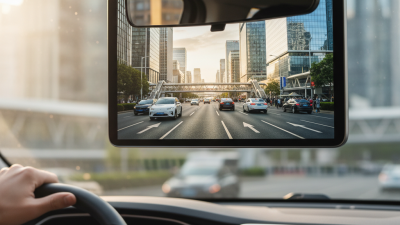
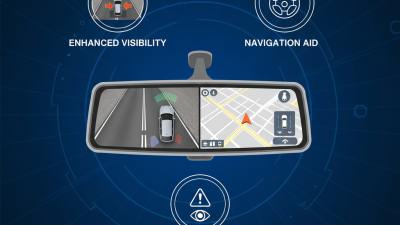
A rear view monitor displays a camera’s image behind your vehicle. It usually sits on the dashboard or replaces the central mirror. Unlike a basic mirror, it can show areas hidden by passengers, cargo, or thick rear pillars. This wider view helps drivers notice cars, cyclists, and obstacles sooner. It also improves visibility during night driving, rain, and low-light parking.

A useful monitor should provide a clear image without distracting glare. Check its screen brightness in direct sunlight. Then test it at night, when excessive brightness can become uncomfortable. A wide viewing angle helps passengers see the image, but extreme width may make objects appear smaller. Look for adjustable camera angles, reliable mounting, and simple controls. Complicated menus can waste attention during busy traffic.

Image quality still depends on camera placement and cleanliness. Mud, road salt, or water droplets can blur the view quickly. Clean the lens often. Keep the display at a natural eye level, rather than forcing your head downward. Installation should follow the vehicle’s instructions and local safety requirements. Professional fitting may prevent loose wiring or incorrect calibration. Still, no monitor removes every blind spot. I once trusted a clear screen too much and missed a low object near the bumper. That mistake remains useful: check the monitor, mirrors, and surroundings together.

How to Choose the Best Rear View Monitor in 2026?

A rear view monitor displays the image from a rear-facing camera, helping drivers see areas that may be difficult to observe through mirrors alone. The chart shows the theoretical horizontal scene width visible 5 meters behind a vehicle at different camera viewing angles.

Wider viewing angles can improve coverage of nearby blind zones, but they may also create more image distortion. The values are calculated using the geometric formula W = 2 × distance × tan(viewing angle ÷ 2), with a fixed distance of 5 meters.

Key Monitor Types, Display Sizes, and Camera Compatibility

How to Choose the Best Rear View Monitor in 2026?

Rear view monitors come in several practical types. Mirror-mounted models replace or overlay the original mirror, saving dashboard space. Dashboard units are easier to install and adjust, especially in older vehicles. Digital mirror displays offer a wider view, but they may require careful brightness control at night. Choose a monitor with clear menus, physical controls, and a stable mounting point. I once selected a screen that looked impressive in the shop. It blocked too much rear visibility when sunlight hit the glass.

Display Size and Visibility

Display size affects both comfort and safety. A 4.3-inch screen suits compact dashboards and simple reversing. Five to seven inches usually provides a balanced view without overwhelming the driver. Larger nine-inch displays show more detail, but they can distract if mounted too close to eye level. Check viewing angles, brightness, contrast, and automatic dimming. Bigger is not always better.

Tips: Match the camera signal first. Check whether the monitor accepts CVBS, AHD, or another format. Confirm the connector, voltage, resolution, and reverse-trigger wiring before buying. Use a camera with suitable night performance and weather protection. Test the image in daylight and darkness. Compatibility matters more than appearance. I would also leave room for mistakes, because wiring diagrams are not always as clear as expected.

How to Compare Image Quality, Viewing Angles, and Night Performance

How to Choose the Best Rear View Monitor in 2026?

Image quality should be judged from the driver’s seat, not only from the specification sheet. A sharp display reveals small obstacles, loose straps, and distant vehicles more clearly. Look for balanced contrast, natural colors, and smooth movement during reversing. Excessive brightness can hide details in a pale sky. Low contrast can blur dark objects near the bumper. In practical vehicle tests, a monitor may appear excellent indoors but less impressive behind tinted glass. That difference matters.

Viewing angle is equally important. Sit slightly left, right, and below the screen before buying. The picture should remain readable without noticeable color shifts or dark corners. Night performance deserves a separate test. Check the image after sunset, under streetlights, and in complete darkness. Strong systems control glare from headlights while preserving nearby details. Infrared assistance can help, but it may create a flat, gray image. I have found that “night vision” claims can sound better than real road performance.

Tips: Compare recordings in the same lighting conditions. Adjust brightness before judging clarity. Wipe the camera lens, then test again. Check whether license plates remain visible at a safe distance. Ask a qualified installer to inspect cable routing and screen placement. Specifications are useful, but they cannot replace a careful test inside your vehicle. You may need to compromise slightly between a wider view and sharper edge detail.

How to Choose the Best Rear View Monitor in 2026? - How to Compare Image Quality, Viewing Angles, and Night Performance
Comparison Dimension Why It Matters Basic Acceptable Level Recommended Level High-Performance Target How to Verify It
Display Resolution Higher pixel counts make license plates, obstacles, and lane markings easier to distinguish. 1280 × 720 pixels (720p) 1920 × 1080 pixels or higher, provided the camera and display both support the same resolution Check the native resolution of both the camera and monitor. A higher-resolution screen cannot restore detail missing from a lower-resolution camera.
Aspect Ratio A matching aspect ratio prevents unnecessary stretching or cropping of the rear scene. 16:9 16:9 with selectable normal, full-screen, and mirror-image modes Display a straight vertical object and confirm that it remains visually undistorted.
Horizontal Viewing Angle A wider angle shows more of the adjacent lanes, but an extremely wide lens can make objects appear smaller and increase edge distortion. Approximately 120° Approximately 150° to 170°, with controlled edge distortion Compare the stated diagonal, horizontal, and vertical angles carefully; manufacturers do not always report the same measurement.
Vertical Viewing Angle Adequate vertical coverage helps reveal low obstacles and the area immediately behind the vehicle. Approximately 70° Approximately 100° or more without excessive fisheye distortion Test the camera on level ground and confirm that the bumper area and a useful distance behind the vehicle are both visible.
Dynamic Range Good dynamic range preserves detail when a bright sky, reflective surface, or headlamp appears behind a darker object. Basic backlight compensation Wide-dynamic-range processing with minimal loss of shadow detail and limited highlight clipping Test at sunrise, sunset, or under a bright lamp behind a person or vehicle. Look for visible detail in both bright and dark areas.
Night Image Performance Most reversing incidents occur in restricted visibility, so usable detail matters more than a bright but noisy image. Usable image with auxiliary light or infrared illumination Clear subject outlines at very low light, with controlled noise, motion blur, and infrared reflection Conduct the same test at dusk and in darkness using a fixed target, fixed distance, and identical vehicle lighting. Lux ratings are not directly comparable unless test conditions match.
Low-Light Noise Excessive grain can hide pedestrians, bicycles, and small obstacles. Visible grain but recognizable objects Low chroma noise and limited smearing during movement Inspect a stationary high-contrast target and a moving target separately. Image smoothing should not erase important edges.
Night Exposure Control Fast exposure changes can cause the image to become too dark or too bright when headlights enter the frame. Automatic exposure with noticeable adaptation delay Stable exposure with highlight protection and minimal blooming around lamps Move a bright light source through the camera view and check recovery time, glare, and retained shadow detail.
Motion Latency Low delay gives the driver a more accurate view when steering or reversing close to an obstacle. Below approximately 200 ms Approximately 50 ms or less under normal operating conditions Record the monitor and a moving reference together with a high-speed camera, or compare the view with a physical moving target.
Refresh Rate Adequate refresh reduces visible judder and helps moving objects appear more naturally. 30 frames per second 60 frames per second with stable transmission and processing Confirm that the camera output, transmission link, and monitor refresh rate support the same frame rate.
Glare Resistance Sunlight and dashboard reflections can make an otherwise capable monitor difficult to read. Anti-glare surface Low-reflection optical treatment, automatic brightness, and a wide brightness adjustment range View the screen in direct sunlight and with a bright light behind the driver. Check readability from the normal seating position.
Color and Contrast Control Correct contrast helps separate objects from the background without crushing dark details. Brightness and contrast adjustment Separate day/night profiles with automatic or manual switching Use a test scene containing black, gray, white, and colored objects. Confirm that dark and bright steps remain distinguishable.
Water and Dust Protection The rear camera is exposed to rain, road spray, dust, and cleaning equipment. IP65 enclosure rating IP67 enclosure rating for temporary immersion protection Look for an independently documented IP code. IP ratings describe enclosure protection, not image quality or impact resistance.
Operating Temperature Extreme heat and cold can affect startup time, screen performance, and camera reliability. Approximately −20°C to 65°C Approximately −40°C to 85°C, where documented by the manufacturer Compare the stated operating range with the vehicle’s climate conditions. Do not confuse storage temperature with operating temperature.
Parking Guide Lines Guidelines can help estimate vehicle position, but inaccurate or fixed lines may give a false sense of distance. Selectable static guidelines Dynamic steering-responsive guidelines with calibration memory Check the lines against measured distances and confirm that they remain aligned when the steering wheel moves.
Image Reversal and Camera Orientation The displayed image should match the driver’s expected left-right perspective. Selectable mirror mode Independent orientation settings for multiple camera inputs Use a clearly labeled object on each side of the vehicle to confirm that left and right are displayed correctly.
Signal Stability Dropouts or interference can remove critical information while the vehicle is moving. Stable wired signal over the required cable distance Stable wired or professionally installed digital link with error-resistant transmission Test with the engine running, lights switched on, and nearby electrical devices active. Watch for flicker, black screens, or interference.
Evaluation note: Resolution, viewing angle, lux sensitivity, dynamic range, and latency are measured differently across products. For a fair comparison, use identical lighting, distance, target, monitor brightness, and vehicle conditions. A balanced system with matched camera and monitor specifications is generally more useful than choosing the highest number in only one category.

Essential Installation, Power, and Vehicle Integration Requirements

How to Choose the Best Rear View Monitor in 2026?

A reliable rear view monitor begins with correct vehicle integration, not screen size. NHTSA’s rear visibility rule requires drivers to see a defined 10-foot by 20-foot zone behind the vehicle. Choose a camera and display that preserve this view without severe distortion. Check whether the vehicle uses a standard reverse signal, CAN bus, or a delayed trigger. Older vehicles may need a signal adapter. S&P Global Mobility reported that the average U.S. vehicle age reached 12.6 years in 2024, so compatibility with aging wiring matters.

Power design deserves equal attention. Use an ignition-switched circuit with an appropriate fuse, secure ground, and protected cable routing. Avoid loose connections near hinges or exhaust heat. Confirm the monitor’s operating voltage before installation. Many vehicles produce electrical spikes during engine start. ISO 16750 addresses electrical and environmental testing for road-vehicle components, but real installations can still fail.

Small details matter.

Mount the camera above the plate when possible. Keep its lens clear of spray, wax, and ice. Test the image in daylight, darkness, and rain. I once trusted a clean daytime image, yet the night view showed strong glare from a nearby lamp. That mistake changed my checklist. Verify automatic dimming, reverse activation, and parking sensor interaction. If the screen blocks mirrors or driver sightlines, integration has gone too far. IIHS research continues to identify rear crashes as a serious safety concern, so installation quality should receive more attention than decorative features.

How to Evaluate Safety Features, Durability, Cost, and User Needs

How to Choose the Best Rear View Monitor in 2026?

Choose a rear view monitor around your actual driving conditions, not impressive packaging. A wide display can help when reversing a trailer or checking children near the vehicle. However, screen size alone does not prevent accidents. Look for low-light performance, minimal image delay, adjustable brightness, and clear parking guidelines. Night testing matters. Drive slowly in a dim parking area and check whether pedestrians, bicycles, and narrow obstacles remain visible. Confirm that the camera angle covers the intended blind zones without excessive distortion. I once trusted a bright daytime image that became nearly useless under rain. That mistake changed how I assess monitors.

Durability deserves practical attention. Check documented resistance to water, dust, vibration, heat, and cold. A secure mounting system should stay steady on rough roads. Wiring also needs protection from crushing, sharp edges, and moisture. Clear installation instructions and a responsive warranty indicate stronger support, but neither replaces careful fitting. Ask a qualified installer to inspect cable routing if the vehicle has complex electronics. Specifications can look reassuring. Real installation may be different.

Cost should include the monitor, camera, wiring, labor, and possible replacement parts. A cheaper unit may become expensive after repeated adjustments or early failure. Match features to your needs. A commercial driver may value continuous operation and rugged housing, while a family driver may prefer simple controls and a larger image. Read independent user reports, especially those describing six months of use. Some reviews are overly positive. Leave room for doubt, and compare evidence before paying.